What is a Screenshot? It is not something people are unaware of, but in case you don’t know what a Screenshot means.
The Screenshot is a snapshot of the screen of your laptop, smartphone, or any gadget you use. It will help you to take a picture of what is going on the screen only.
If you are an HP or even dell user, but you don’t know how to capture Screenshots on an HP laptop or computer, don’t worry; it is not complicated at all.
We will share discuss in detail how to capture snapshots on an HP system in detail. The laptop has become an essential need for people in today’s life.
Still, many people are not very much aware of technology and do not know some stuff, such as capturing a snapshot, etc.
When we talk about users of Windows 8 or Windows 10, many people are unaware of how to capture the entire or partial portion of the screen.
Not to worry, here we will discuss all the processes in the easiest way possible to make you understand better. But before moving further, let’s know what Screenshot means exactly.
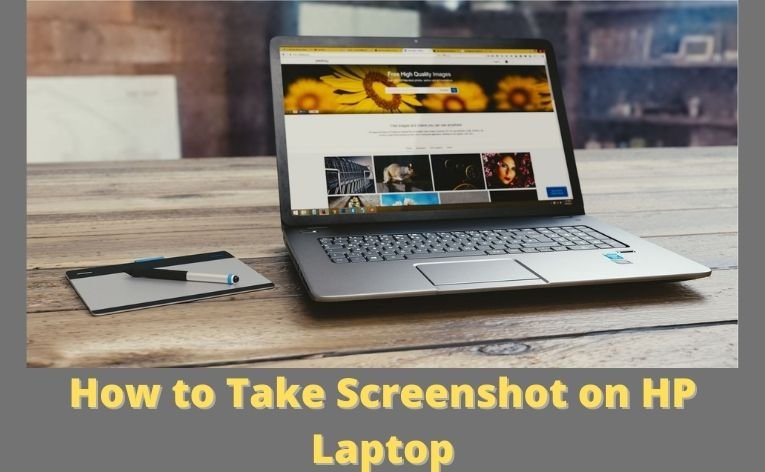
How to Take Screenshots on HP Laptop?
Here are the different ways.
1. Default Way for Full Screen
In HP laptops, they run Chrome operating settings and Windows systems, which simply allows you to capture screenshots using the print-key button.
Most of the time, the captured snap does not get saved at that time; instead, it gets copied into the system’s clipboard. Follow the procedure below to save your image.
- Press the windows and Print-Screen keys at the same time to take a snapshot. The screen will get dimmed for a moment as an indicator of a successful capture.
- Open any image editing program like Photoshop, GIMP, and Microsoft Paint.
- Please open a new image and paste it by using Ctrl-V.
- Now save the file as PNG or JPG. The Screenshot is ready.
2. Default Way for Partial Screen
If you don’t want to capture the entire screen in the snapshot, you should go for a snip and sketch to take a selective screen print instead of just some of the screen.
When we talk specifically about Windows 10, how to take Screenshots on a laptop Windows 10, there is a default feature introduced by Windows 10 laptops.
The feature allows you to take a partial snapshot of your screen without any need for additional applications. Follow these steps to capture the relevant portion of your screen.
- Press the Windows key, Shift button, and S key at the same time. There will be a white overlay showing on your screen, and the cursor will turn from pointed to crosshair cursor.
- Now select the relevant part of the screen you want to copy. Snippets will disappear from your screen and will be copied onto your system’s clipboard.
- Now open any image editing program.
- Please open a new file and paste it with Ctrl-V.
- The Screenshot is ready; save the image as PNG or JPG as you like.
3. Snipping Method
Windows 10 comes with so many updated versions compared with the previous versions.
For example, if somebody asks how to take a Screenshot on laptop windows 8? Whether you use your computer on Windows 7, 8, 10, or Vista, the snipping tool is an exciting feature to capture snapshots.
The snipping feature allows users to take any size of portion to capture for instant results. Almost all Windows computers are equipped with this tool; the application is located in the start menu. Once you access it, follow these steps to capture a snapshot.
- In the snipping tool app, press Ctrl-N or NEW for creating a new snip.
- Use the crosshair cursor, and drag it to form a rectangular border on the desired part.
- On the snipping tool’s toolbar, click on the disk icon; it will allow you to save the Screenshot as PNG or JPG how you like.
The snipping tool offers several additional exciting features that allow you to switch modes.
In addition to a regular rectangular snip, it can be done three other ways as well.
By using its free-from-snip feature, you can capture an image in any shape you want.
Another exciting feature, Windows snip, allows users to capture a snapshot of an active picture at a click distance. The third and last but not least full-screen snip feature takes a Screenshot of the entire display on the screen.
It is helpful for dual-monitor display as it allows users to take Screenshots of both screens simultaneously.
This tool also offers a pen and high-light option; by using that, you can draw on the picture for making annotations and point-outs easy and straightforward.
4. SnagIt
SnagIt is a perfect tool for photo editors and annotators.
It offers an easy-to-operate interface with several additional features that allow taking Screenshots easier than ever, from taking screenshots to editing and resizing them. One of the exciting features of SnagIt is, it will enable you to capture videos as well.
Follow these steps to capture the screen using the SnagIt tool.
- Download SnagIt, and once done with it, open the app.
- There is a red circle button on the top side of your screen, press that button to access the camera to capture a snapshot.
- Now select the camera icon for the captured image or the recorder icon for a captured video.
- The image of your desktop will appear in the application. Now you can annotate, edit, resize, copy or save the captured image from here.
Screenshot without Print Screen Key
Sometimes it happens that the laptop doesn’t have a key for taking screenshots. When you do not have a print screen key on your computer, how to take a Screenshot on a laptop without a print screen button?
You can use a virtual keyboard or snipping tool to capture screenshots.
1. How to Take Screenshots with the Snipping Tool
First, you will be required to press the windows key in the start menu. Once it’s open, then search for the “snipping tool” there.
Now click on the snipping tool for launching the utility. Place the cursor on any corner of the screen.
Hold the mouse and press its left button, then drag diagonally to the opposite side of the screen. Now release the button to capture the whole screen. Your image is now opened in the snipping tool; you can simply save it by pressing the Ctrl-S keys.
2. How to Take Screenshots with On-Screen Keyboard
Here again, you are required to press the windows key. Once it’s opened, type “on-screen keyboard” in the search bar. It will show you the on-screen keyboard.
To capture the screen, open the tab on which you want to take Screenshots, then press the “PrtScr” button.
Store this snap in the clipboard. Now paste this image into any image editor by simply pressing Ctrl-V and saving it. Your Screenshot is ready.
The methods we discuss usually work on any laptop. But if we talk mainly about taking Screenshots on an HP laptop, follow the procedure below.
You may also like my guide about resetting hp laptops easily and safely.
What is a Screenshot?
The screen is the display area of your system’s led and a shot means the picture taken by someone on your system’s screen.
The Screenshot is also known as Screen-grab, Screen-dump, and Screen-Cap. A Screenshot is a unique and straightforward method to picture your screen display in simple words.
One of the easiest and universal ways of taking Screenshots on any laptop is using the print screen option. In case you have no idea about what is the print key? The print key or Print Screen is a button on the keyboard that allows you to capture the screen’s snap.
To take a snapshot with the print key, you need to open the tab which you want to capture. Once it’s open, you will have to press the print key button. Once done with that, now open Microsoft paint or word and simply paste it there. Your Screenshot is ready.
Why do You Need to Take Screenshots?
Snapshots can happen to be extremely useful if you want to show some edits you made somewhere, for example, if you have made edits on a webpage.
You are required to display it in your office or to your colleagues. It is also a great thing when you are on a video call. If you find something relevant or essential that may help you with the project; you can capture that for future benefit.
This beneficial yet straightforward feature helps accommodate a lot of stuff related to your casual or official stuff. You cannot hold a camera in your hands all the time and keep taking pictures of every page of a website you browse.
Even if you do, it doesn’t give a neat or professional look.
For these purposes, the option of a snapshot is a breeze. Let’s move to the details, how to take Screenshots using different ways.
Conclusion
So that’s it “How to Take Screenshots on HP Laptop?” To take a snapshot on a laptop is not a big deal at all. It’s simple and easy, like anything, by using a print-screen key and then pasting it to any pasting program.
But in some cases, if the windows do not support Screenshot or your normal keyboard doesn’t have the “Print-screen” key, it can still be done if you follow the guide correctly.